Turning a Masonry Cavity Wall into a Rainscreen Wall
Words: Keith Lolley
Words and Photos: Keith Lolley, President Advanced Building Products, Inc.
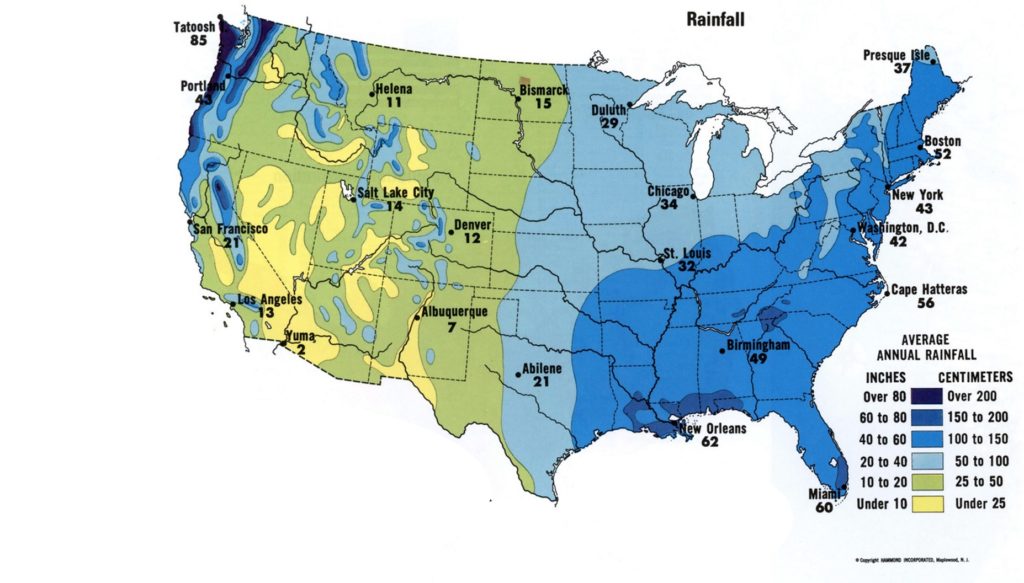
In recent years, the term rainscreen has become more prevalent in the construction industry. Organizations, such as the Rainscreen Association in North America (RAiNA), have gathered some of the best minds in the construction industry with the goal of educating the building community on ways to build more efficient wall systems. One way to improve wall systems is by incorporating a capillary break between the backside of the cladding and the front side of the backup wall. Industry professionals recommend walls be built with a capillary break in regions receiving over twenty inches of annual rainfall. So why is a capillary break suddenly so important?
Advancements in building science have led to innovations in building materials. These advancements propel our industry forward. With innovations also come considerations that need to be accounted for. For example, vinyl and wood were the claddings of choice for residential applications for decades. These face-sealed, or direct applied wall systems incorporate a water-resistant barrier between the back side of the cladding and the front side of the sheathing. This is the main source of moisture protection.
In today’s building environment, there are multiple options for cladding choices. There is stucco, fiber cement, manufactured stone, metal, EIFS, brick, and even glass. Eighty-one percent of all claddings used in construction today are made of absorptive materials, which means moisture will enter and travel past the cladding and into the wall system. With ninety percent of all wall failures being a direct result of moisture intrusion, we need to build walls where gravity can do its job. Incorporating a capillary break in wall designs is the best way to accomplish this goal. My company has a slogan. We manufacture products that allow moisture to Drain, Not Remain™. This should be the mindset when designing walls to comply with current building materials and the current building codes of today.
In 2021 the International Residential Code and International Building Code both call out the need for a capillary break of 5mm when building with masonry claddings. Stucco to be more specific. The codes also call for a water-resistant barrier that can drain at minimum ninety- percent. These advancements are necessary to keep these innovative claddings performing at their best.
Often, we receive calls asking to order our rainscreen mat. Keep in mind, a rainscreen is a wall system, not a product. That would be like someone calling up asking to order our cavity wall. Speaking of cavity walls, what is the difference between a rainscreen wall and a cavity wall?
A rainscreen wall is a drained and ventilated wall. This means the wall is designed with a capillary break throughout the entire surface area of the backup wall allowing gravity to do its thing, meaning allow moisture to drain down and out of the wall. These wall systems are also designed with openings at the top of the wall for convective ventilation. The ventilation aspect is crucial to the removal of water vapor. A rainscreen wall allows air into the wall system, which in turn allows the wall to dry on the inside by the air being moved in a convective fashion. By allowing air into the wall system, we help moderate the pressure differences between the outside environment and the inner wall environment. A drained and ventilated rainscreen wall system controls the amount of moisture that enters the wall assembly.
Cavity wall systems were the first to realize moisture will get past the first line of defense, the cladding, so an airspace needed to be created within the wall to allow gravity to do its thing once again. Let the moisture Drain, Not Remain™. Cavity walls need accessories to manage moisture efficiently, such as a drip edge, through-wall flashing, air or vapor barrier, mortar deflection, and weep vents. Cavity walls, also known as drained and vented wall systems, will not control the amount of moisture that gets into the wall system. It just builds a wall with the necessary components to remove the moisture once it passes through the brick cladding.
So, how can we turn a masonry cavity wall into a drained and ventilated rainscreen wall system? It’s simple. Think of a rainscreen wall design as a car engine. For your engine to work efficiently there needs to be an intake and an exhaust. In other words, a place where air can enter the wall and exit the wall. This can be accomplished by placing weep vents, or open head joints at the base of the wall. There should already be weep vents or open head joints at base flashing locations anyway, which means we already have the first step in place towards a rainscreen wall assembly.
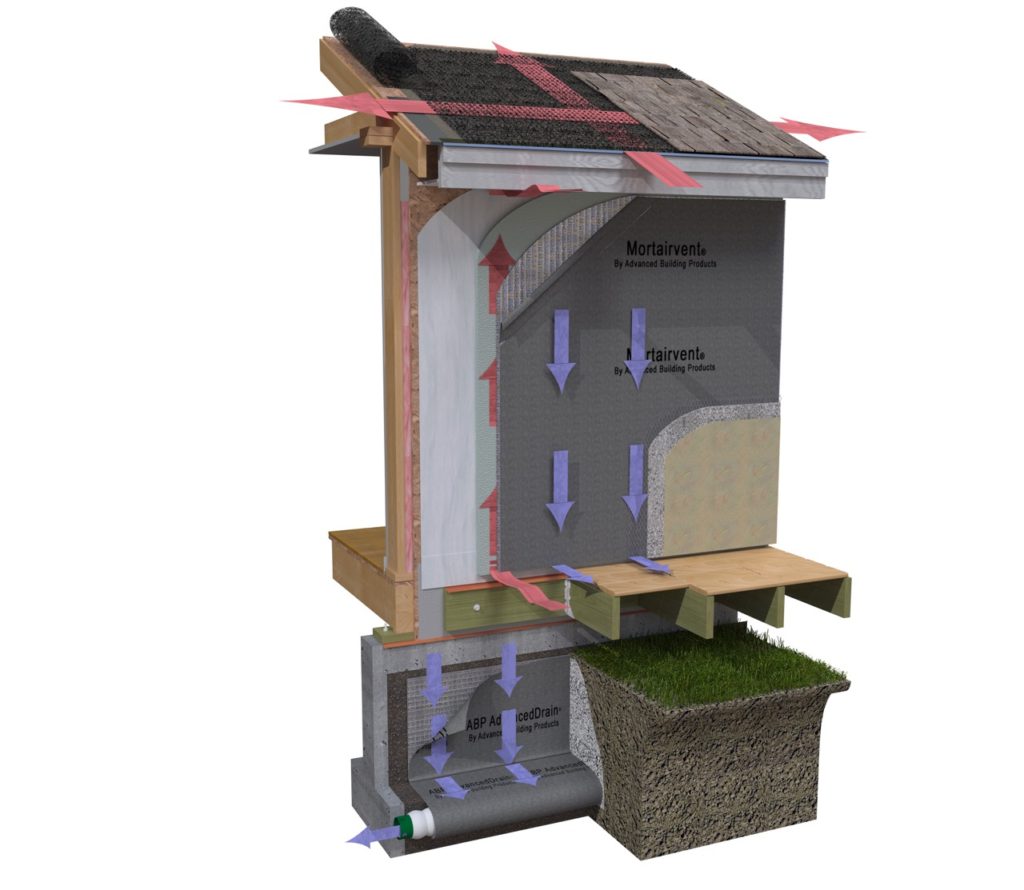
Now we need to place weep vents or open head joints at either the top of the wall, or at each floor level. This will compartmentalize the cavity wall and allow for proper air intake and exhaust. But wait! What size airspace is necessary? Unlike the 5mm airspace called out in the IBC and IRC, commercial masonry recommends a minimum of one inch for an airspace. As we all know, a one-inch airspace tends to be nominal. It is common for the airspace to vary slightly when building a multi-story brick building. If the airspace varies to the point of being under one inch, the wall is no longer code compliant. More importantly, the wall runs the risk of being filled with mortar droppings, which can allow moisture to bridge across the airspace far above the through wall flashing meant as a moisture defense mechanism.
What if there was an easy and effective way to keep a consistently clear one-inch airspace from the bottom of the wall all the way to the top? What if there was a guide to keep the airspace within compliance of the building code while under construction? What if there was an uncomplicated way to turn a masonry cavity wall into a masonry rainscreen wall? There is. By incorporating an all-wall drainage and ventilation mat into your commercial masonry cavity wall design, mason contractors can build to the industry minimum one-inch airspace and know it will work effectively from the bottom of the wall all the way to the top. How will a drainage and ventilation mat work effectively?
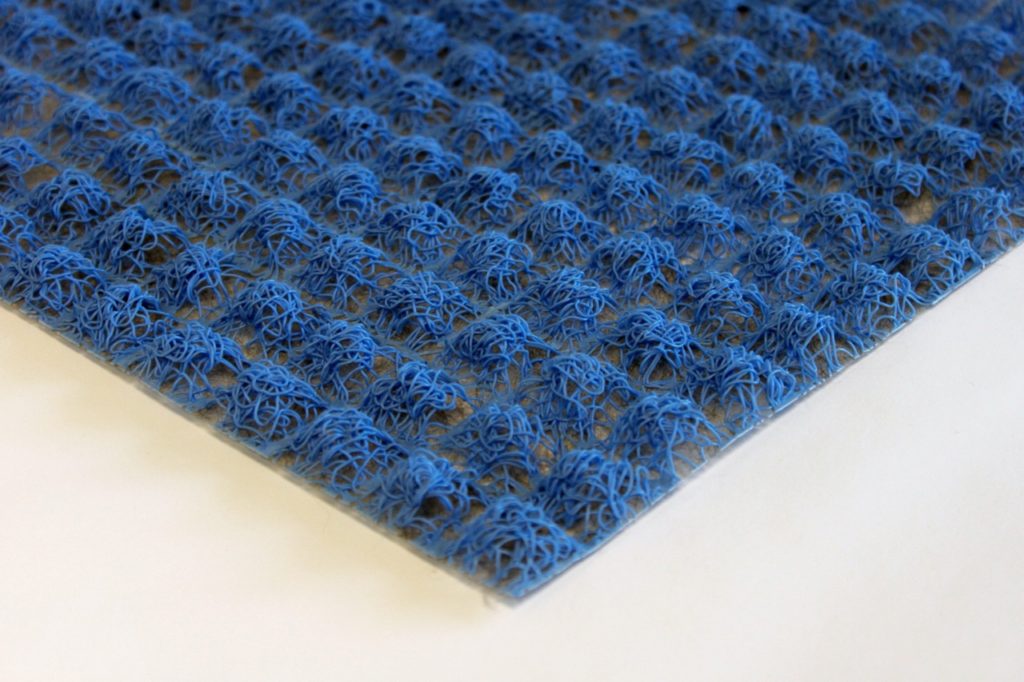
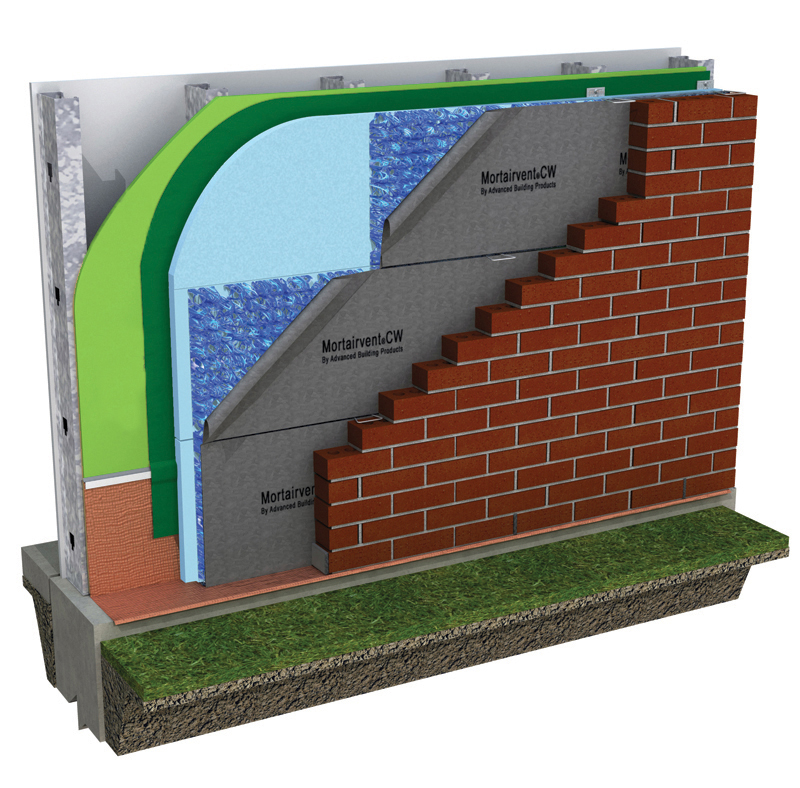
First, make sure the drainage and ventilation mat has a heat bonded filter fabric on the outer facing side of the mat. The filter fabric becomes the mortar deflection. The fabric allows moisture through, but not the mortar. This leaves a one-inch airspace unobstructed by mortar; therefore, allowing the code minimum to perform as originally designed. Why heat bonded? Simply because it is a stronger bond compared to a glued-on fabric.
Second, be sure the drainage and ventilation mat are manufactured from an entangled mesh. Most entangled mesh products are manufactured with a ninety to ninety – five percent open design. This mesh design doesn’t allow an abundance of residual moisture to hang around within the wall system.
Third, the drainage and ventilation mat should be slightly compressible. It is easier for the installer to work with. Especially if the installation calls for the wall ties to penetrate the entangled matrix. We also need to consider the mason’s hands, fingers to be specific. As the installer works within the confines of a one-inch airspace, they need to be able to work with the product, not be constantly fighting it.
One last thing to consider when specifying an all-wall drainage and ventilation mat, the width. The drainage and ventilation mat should have the ability to be installed in sixteen-inch widths. Why does it need the ability to be sixteen-inches wide? Unlike residential applications calling for an all-wall drainage & ventilation mat, when it comes to the sheer size of commercial masonry jobs, the drainage and ventilation mat is usually installed as the brick is being installed. A sixteen-inch-wide roll fits between the wall ties and goes much easier during brick installation.
An all-wall drainage and ventilation mat vs. a mortar deflection. That sounds expensive. Not necessarily. Most cavity walls have a two-inch air space. Why? Often the mentality is the wider the airspace the better the chances of proper drainage. That theory makes sense when we think of a cavity wall design, but we are now thinking of a rainscreen wall design. Remember what I said earlier, a rainscreen wall design controls the amount of moisture that enters the wall system. This is done by allowing air into the wall. The wider the airspace, the more air we need to allow into that airspace for pressure neutralization. Since moisture travels through the air, the wider the airspace, the more moisture we allow into the wall system before pressure neutralization can occur. Keep in mind, the wider the airspace the more oxygen you have within your wall as well. Oxygen is fuel for fire. If a fire ever occurred within the wall system, a wider airspace could be a concern.
With changes to energy codes, we are seeing thicker outboard insulations being used. For example, I was working on a recent project that called for a three-inch rigid outboard insulation with a two-inch airspace. The wall ties needed to span over five inches. The through wall flashing widths needed to increase as well. The overall footprint of the wall increased. The one thing masonry cavity walls do not need in today’s competitive building environment is a more expensive wall. Especially with the advancements in panelized claddings that offer numerous designs and faster installation times.
So, let’s get back to the code minimum one-inch airspace. Utilizing an all-wall drainage and ventilation mat can reduce the width of the wall. Reduce the costs of various wall components. Reduce the chance of flame spreading due to the one-inch airspace and be code compliant at the same time.
When it comes to moisture related issues within a commercial masonry wall, such as mold, rotting, structural damage, and poor indoor air quality, these restoration costs are extremely expensive and time consuming. To avoid these issues, we must keep these absorptive walls as dry as possible. Rainscreen drainage & ventilation walls are a proven design to achieve this goal and the best way to keep these walls dry is to have convective airflow from the bottom to the top of the wall. A capillary break, along with proper membrane detailing, is essential for a healthy wall.
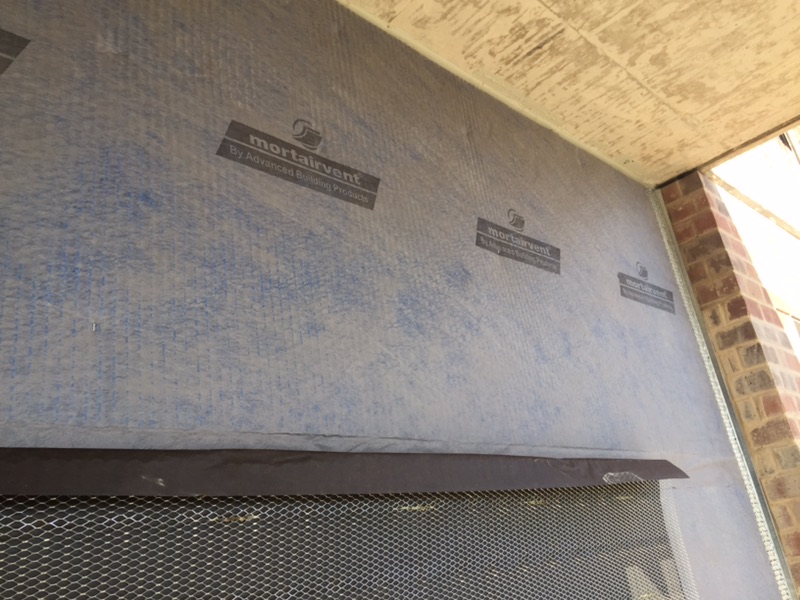
My company, Advanced Building Products, has been manufacturing moisture protection products since the 1980’s. When it comes to an all-wall drainage & ventilation mat, we manufacture a product called Mortairvent®CW, which is an all-wall mortar deflection that serves as a drainage & ventilation mat to assist in the rainscreen wall design. For more information, please visit www.mortairvent.com, or call us at 800-252-2306.